Google search console is a great tool that can help you optimize your website, blog, e-commerce store. As it will give you access to its various reports and tools, it is quite useful for measuring search traffic, performance etc. Search console also has tools that highlight the issues your website is facing. Having a search console account is beneficial as it will help your website perform better in google search result.
After adding your domain to google search console you need to verify it through your domain name provider/hosting account. Here, I’m using “Hostinger”, for this example below. The overall process remains the same but it may be slightly different based on the different web hosting companies or the domain name providers. Simply find the “DNS Zone Editor”/”DNS Record” in your hosting account for adding the “TXT record”.
Here, I’m going to guide you through the whole process of adding and verifying your domain property in google search console. Simply follow these methods step by step.
Add & Verify Domain property via DNS record:
Step 1: First open/sign in to your google search console account.
Step 2: Next, click on search property in the search box.
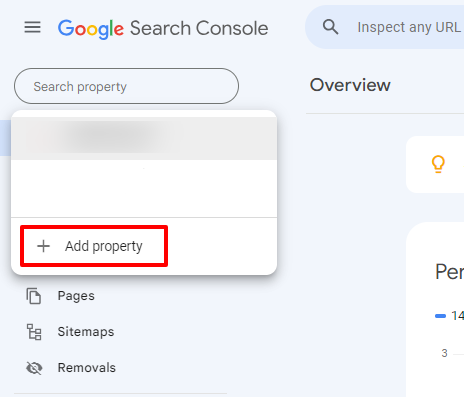
Step 3: Now click on “+ Add property”. A box will pop up where you will be asked to submit your domain name.
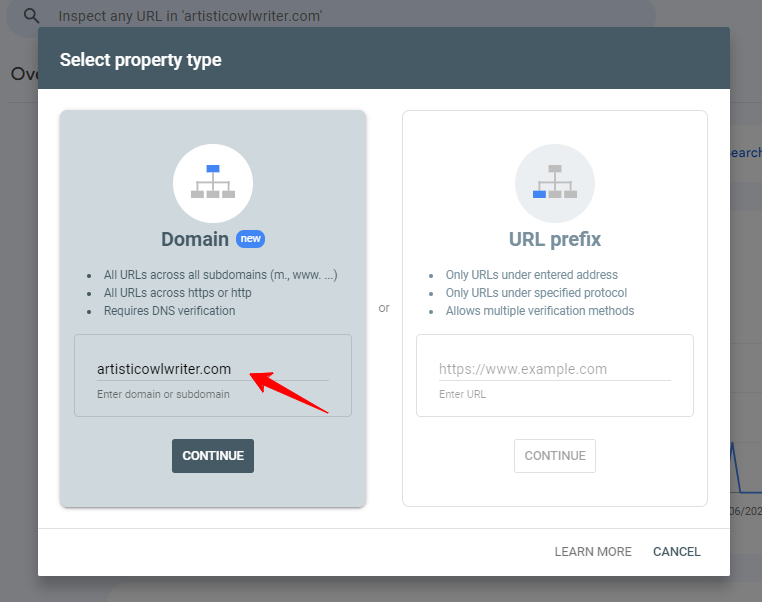
Step 4: Here, type your domain name. Now enter only the domain name. Don’t put the domain prefix such as “www” before it. You can see here I have only entered the domain name artisticowlwriter.com. Click continue.
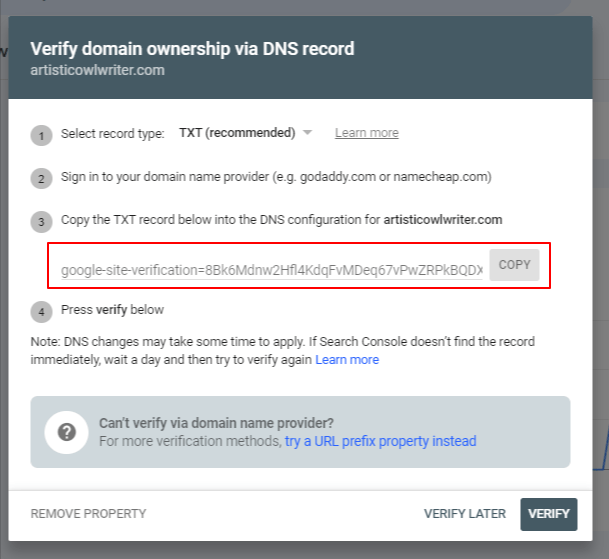
Step 5: A box will pop up where you will be notified to ‘Verify domain ownership via DNS record”. Copy the “TXT record”.
[Note: There are other methods to verify your domain. You can use multiple methods to verify your domain. In this example we are verifying via DNS record.]
Step 6: Now, log in to your Hostinger account. [If you use some other web hosting company such as GoDaddy, Bluehost etc you can the same methods. ]
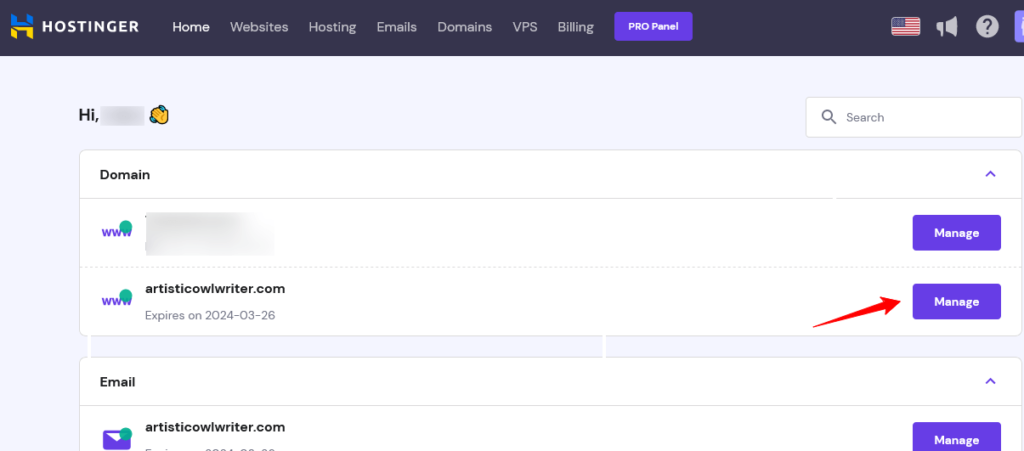
Step 7: From the homepage choose the domain that you are verifying and click on “Manage”.
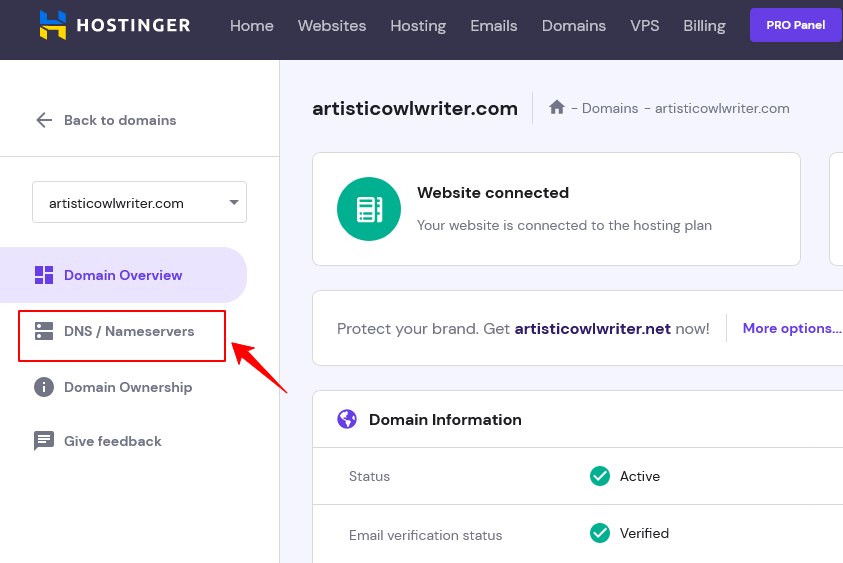
Step 8: On the left side you will find the “DNS/Nameservers”. Click on it.
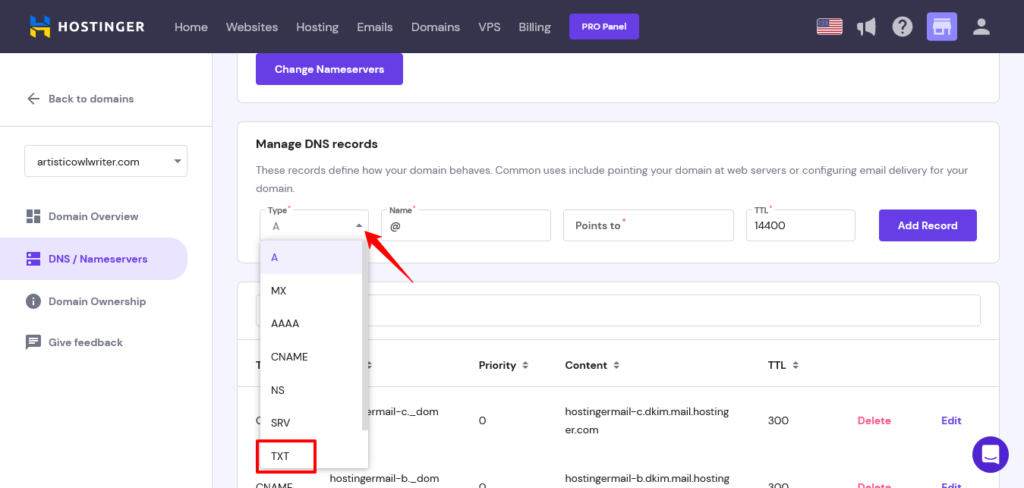
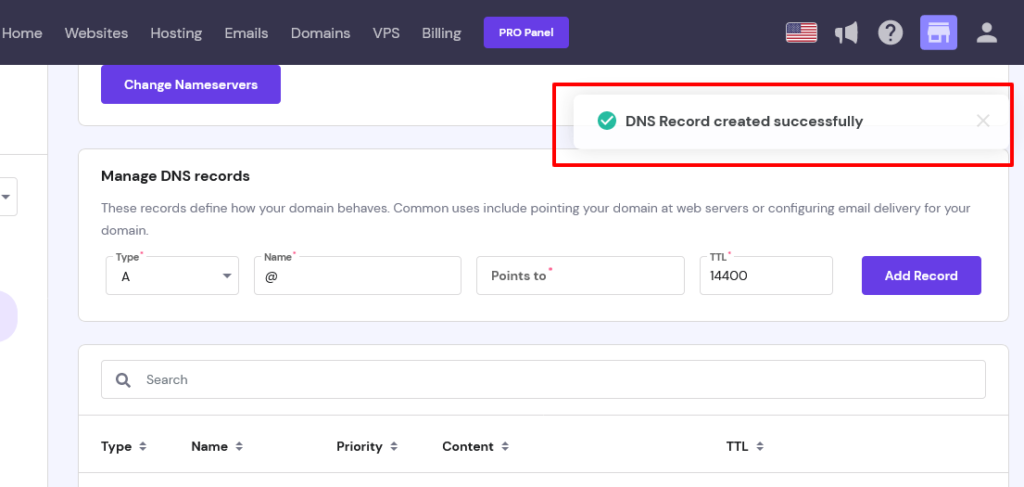
Step 9: Scroll down below and find “Manage DNS record”. Under “Type” replace “A” record with “TXT” record.
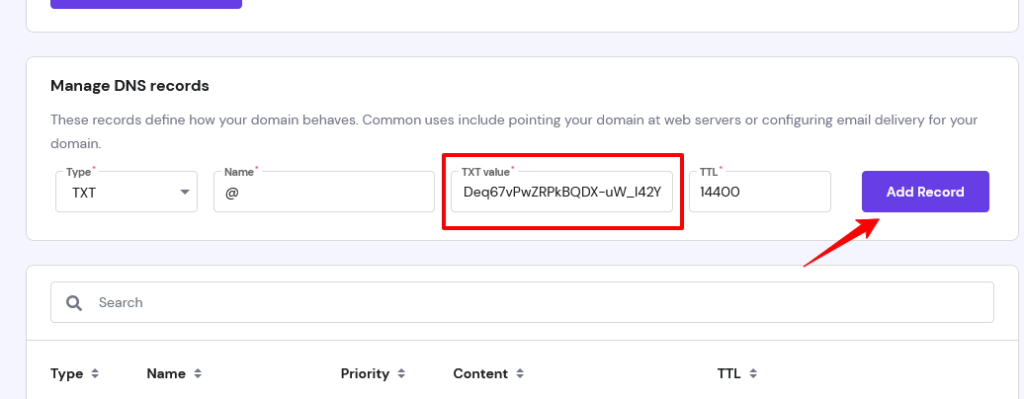
Step 10: Now, paste the “TXT” record that you copied from google search console in the “TXT value” box. Keep the rest unchanged.

Step 11: In the next step after finishing adding the “TXT value”, click on add record.
Step 12: Next, you will receive a notification informing “DNS record created successfully”.
Step 13: Next, go to your search console account and click on verify button.
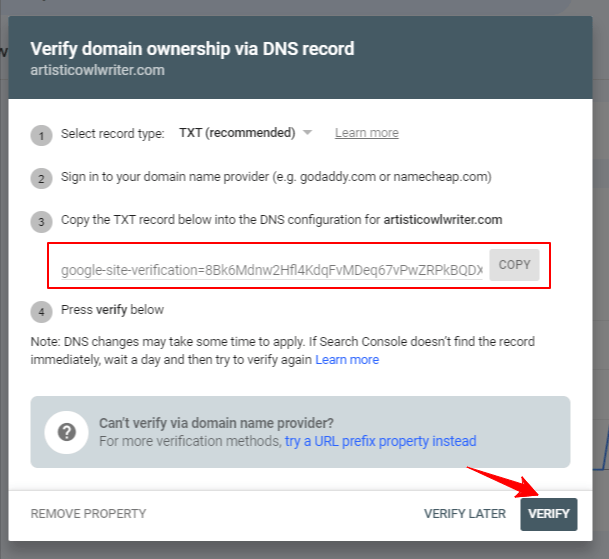
Step 15: Now, if you click on the verify button, your domain will be instantly verified.
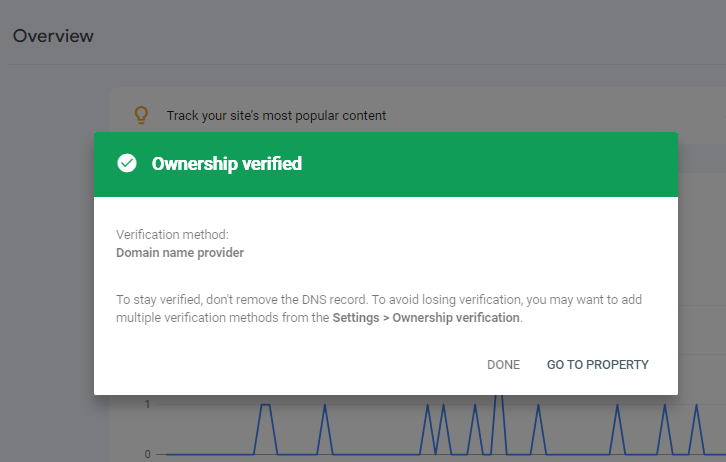
If your domain doesn’t get verified instantly you should wait for 24 hours. Click on the verify button again. Sometimes it takes 24 hours to get verified.

